
How to Remove Noise and Grain from a VHS with Neat Video
What Is Noise on a Digitized VHS?
Video noise — often called grain — is inherent to the VHS format. It comes from the low information density recorded on magnetic tape, amplified by the aging of the cassette, humidity, and the quality of the playback deck. Once digitized, this grain appears as parasitic colored pixels, most visible in dark or uniform areas of the image.
Some people appreciate this look for its nostalgic quality. Others want to reduce it for a cleaner result. That is where Neat Video comes in — a professional plugin compatible with Adobe Premiere Pro, Final Cut Pro, and DaVinci Resolve.
Installing Neat Video
Download Neat Video from www.neatvideo.com. A free trial version (with watermark) and a paid full version are available. Once installed, the plugin appears in the video effects list of your editing software.
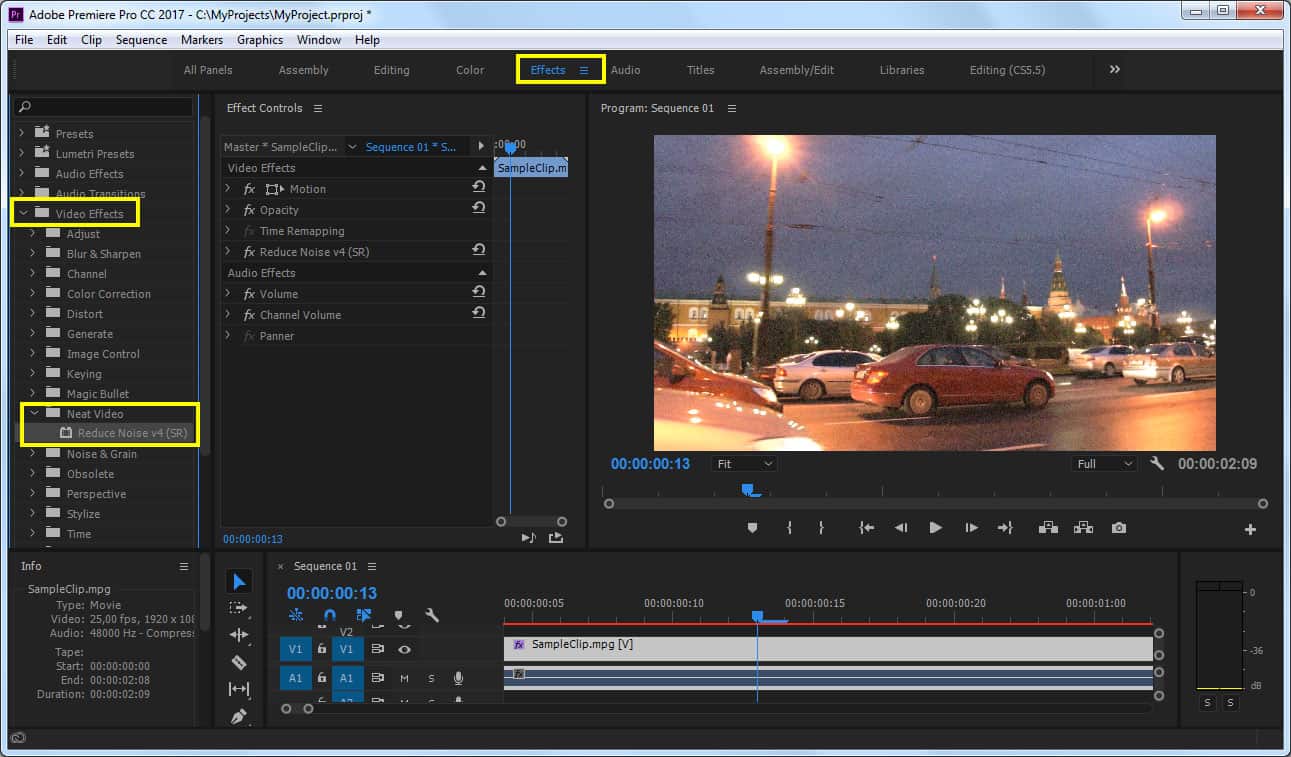
In Adobe Premiere Pro, type “Neat Video” in the effects search bar and drag it onto your clip.
Creating a Noise Profile
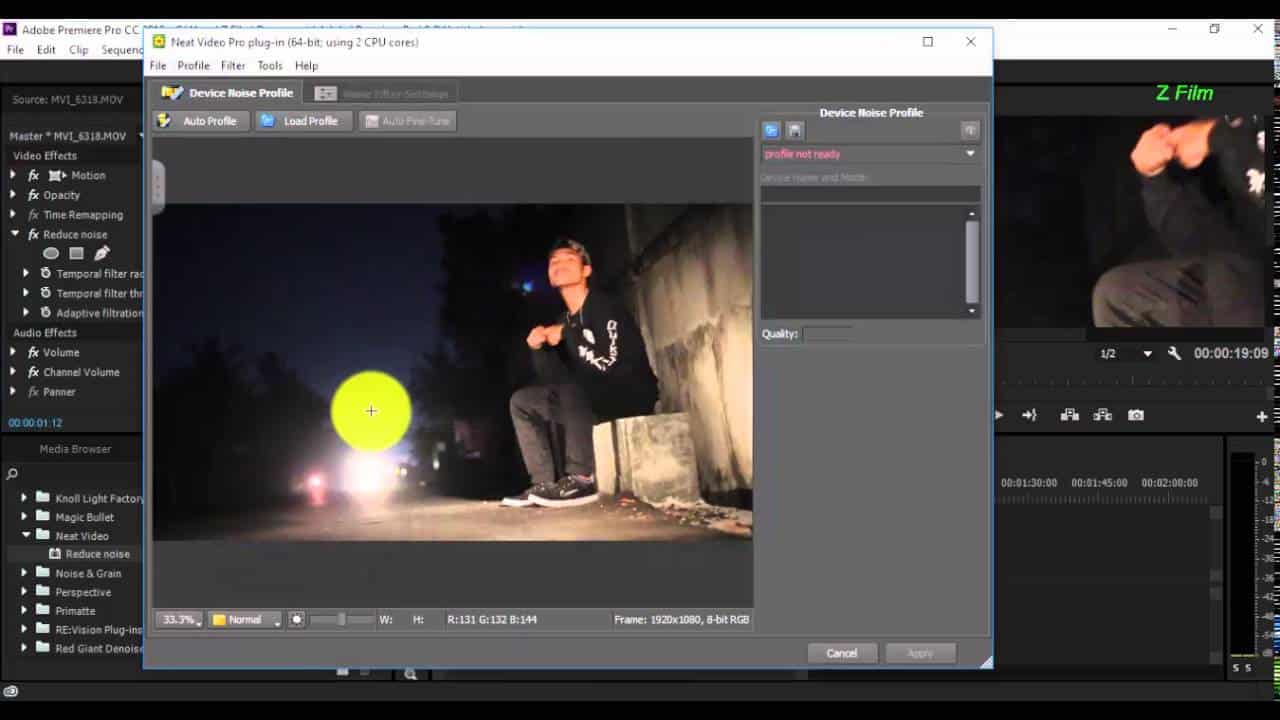
This is the most important step. Neat Video needs to analyze an area of the image to identify the noise frequency it must reduce.
Automatic profile — Neat Video selects an area on its own. Convenient, but unreliable on VHS content where grain is irregular.
Manual profile (recommended) — Move the analysis area onto a uniform section of the image: a grey sky, a white wall, a dark background. This area should contain as little actual detail as possible, so that Neat Video analyzes only the noise, not the real image content.
Once the area is selected, click “Auto Profile” or “Build Profile.” Neat Video then displays an analysis of the detected noise frequency.
Adjusting the Sliders
After the profile, move to the noise reduction tab. Work with the sliders — start with low values (20–40%) rather than maximum settings.
A common mistake is applying too aggressive a reduction. VHS resolution is already low (around 240 horizontal lines). Setting values too high will smooth the image to the point of losing all detail, edges, and contrast. The result looks artificial and unpleasant.
Working Sequence by Sequence
This is the most frequently overlooked point. A file digitized from a VHS tape rarely has uniform lighting conditions throughout. A scene filmed indoors at night will have very different grain from a scene filmed outdoors during the day.
Split your timeline into segments by shooting conditions and create a separate noise profile for each segment. Applying a single profile to the entire file will produce an inconsistent result: some areas will be over-smoothed, others barely corrected.
Rendering and Performance
Neat Video is resource-intensive. GPU processing is available if your graphics card supports it — enable it in the preferences to reduce render time. On a standard machine, expect render times significantly longer than the actual duration of the video.
Should You Always Use Neat Video on VHS Footage?
Not necessarily. VHS grain is sometimes too deeply embedded in the image to be corrected without visible damage. If after several attempts the result is still unsatisfying — image too blurry, loss of detail — it is better to keep the original image as-is. An honest grain is often more watchable than a plasticized, over-processed picture.
You prefer to leave this step to a professional? Check our pricing, or contact me.